Materials:
- 6" x 6" Tagboard
- Foil Paper a Smidge Larger Than 6" x 6"
- Snowflake Print Out
- Glue Stick
- T-Pins
- Wooden Scratcher Tool
- Yarn
- Scissors
- Tape
I originally saw this lesson on Show Tell Share, but really couldn't figure out how she set up the whole project. That being said, this is my take on how to go about this lesson :).
1. Glue down tagboard onto back side of foil paper.
2. Snip off the corners at an angle.
3. Fold edges of foil paper over onto tagboard and glue down. You should have nice, clean edges.
4. Glue down snowflake print out onto tagboard side. I just made this one on Word.
5. Label the dots inside the arms 1-7, starting from the outside and working towards your way in.
6. Write your name anywhere you find a blank spot.
7. With a T-Pin, poke a hole in the center of your dots.
8. With a wooden scratching tool, and using your T-Pin holes as a guide, poke your stick through the T-Pin hole to stretch it out.
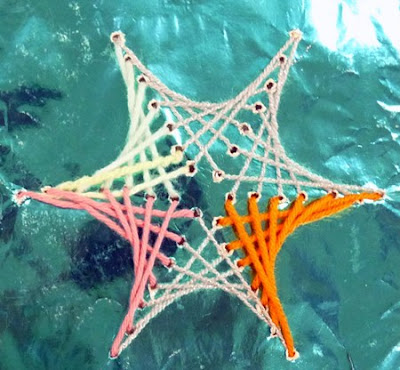
Make sure to poke through with the shiny side facing you, so that the burrs are on the backside. I learned this after doing this with a class, so you can see below what it looks like with the burrs on the shiny side. The girl on the bottom right is the one who enlightened me to do it the other way! : ) Look how nice and neat her holes are!
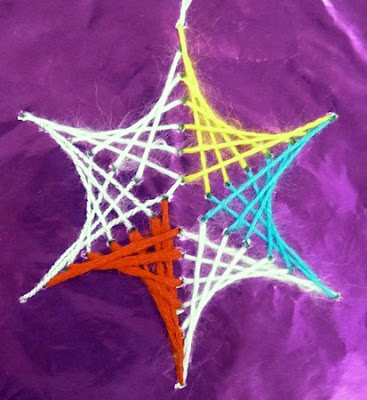
9. Now for the weaving- With the snowflake side facing you, stick a piece of yarn through hole 1. Now go through hole 7 on a leg right next to the leg you started with. Next you'll go through hole 2 of the original leg and then hole 6 of the adjacent leg. Basically you're going to go through 1 to 7, 2 to 6, 3 to 5, 4 to 4, 5 to 3, 6 to 2, and then 7 to 1 ... or... up one leg and down the other. Trust me- it's a LOT easier than read! Just try it, I promise.
10. Tape down any yarn ends to the back.
Pin It
- 6" x 6" Tagboard
- Foil Paper a Smidge Larger Than 6" x 6"
- Snowflake Print Out
- Glue Stick
- T-Pins
- Wooden Scratcher Tool
- Yarn
- Scissors
- Tape
I originally saw this lesson on Show Tell Share, but really couldn't figure out how she set up the whole project. That being said, this is my take on how to go about this lesson :).
1. Glue down tagboard onto back side of foil paper.
2. Snip off the corners at an angle.
3. Fold edges of foil paper over onto tagboard and glue down. You should have nice, clean edges.
4. Glue down snowflake print out onto tagboard side. I just made this one on Word.
6. Write your name anywhere you find a blank spot.
7. With a T-Pin, poke a hole in the center of your dots.
8. With a wooden scratching tool, and using your T-Pin holes as a guide, poke your stick through the T-Pin hole to stretch it out.
Make sure to poke through with the shiny side facing you, so that the burrs are on the backside. I learned this after doing this with a class, so you can see below what it looks like with the burrs on the shiny side. The girl on the bottom right is the one who enlightened me to do it the other way! : ) Look how nice and neat her holes are!
9. Now for the weaving- With the snowflake side facing you, stick a piece of yarn through hole 1. Now go through hole 7 on a leg right next to the leg you started with. Next you'll go through hole 2 of the original leg and then hole 6 of the adjacent leg. Basically you're going to go through 1 to 7, 2 to 6, 3 to 5, 4 to 4, 5 to 3, 6 to 2, and then 7 to 1 ... or... up one leg and down the other. Trust me- it's a LOT easier than read! Just try it, I promise.
10. Tape down any yarn ends to the back.


No comments:
Post a Comment